


Latches are often unsung heroes in our everyday lives. They may be small, but their impact is significant—from securing doors to keeping cabinets closed and ensuring privacy. Understanding latches can empower you to enhance your home’s functionality and security.
Whether you’re tackling a DIY project or just need to replace an old latch, knowing the ins and outs of these handy devices will set you up for success. In this guide, we’ll explore different types of latches available on the market, the tools you’ll need for installation, and provide a simple step-by-step process that anyone can follow. Let’s dive into the world of latches together!
Types of Latches
Latches come in various types, each designed for specific applications. The most common is the sliding bolt latch. This type features a simple mechanism that slides into place, providing reliable security for doors and gates.
Next up is the spring-loaded latch. It automatically snaps shut when you push it closed, making it user-friendly and ideal for busy households.
For those looking to enhance security further, consider the deadbolt latch. This robust option requires a key or thumb turn to unlock, deterring unwanted entry effectively.
Another popular choice is the cam latch. Often used on cabinets and lockers, its unique design provides easy access while still keeping contents secure.
Magnetic latches offer a sleek solution. These use magnets to hold doors closed gently yet securely without visible hardware intruding on aesthetics. Each type serves unique needs depending on your project requirements.
Tools and Materials Needed
When it comes to installing a latch, having the right tools and materials is essential. A tape measure ensures accuracy when marking your placement.
You’ll need a pencil for precise markings on your door or gate. A drill is crucial for creating holes, while screws will secure the latch in place.
A screwdriver—either manual or electric—will make installation smoother. If you’re working with metal latches, consider using a hacksaw to adjust them as needed.
Don’t forget safety goggles! Protecting your eyes during drilling prevents unnecessary injuries.
Grab some wood putty if you’re working with wooden surfaces; it’s perfect for filling any gaps once you’ve installed the latch. With these items at hand, you’ll be ready to tackle your project efficiently.
Step-by-Step Guide to Installing a Latch
Start by gathering your tools and materials. You’ll need a latch kit, screws, a drill, and a screwdriver. A measuring tape is also handy for precise placement.
Next, identify the location for your latch. Ensure it aligns well with the door frame or gate edge where you want to install it. Mark this spot clearly.
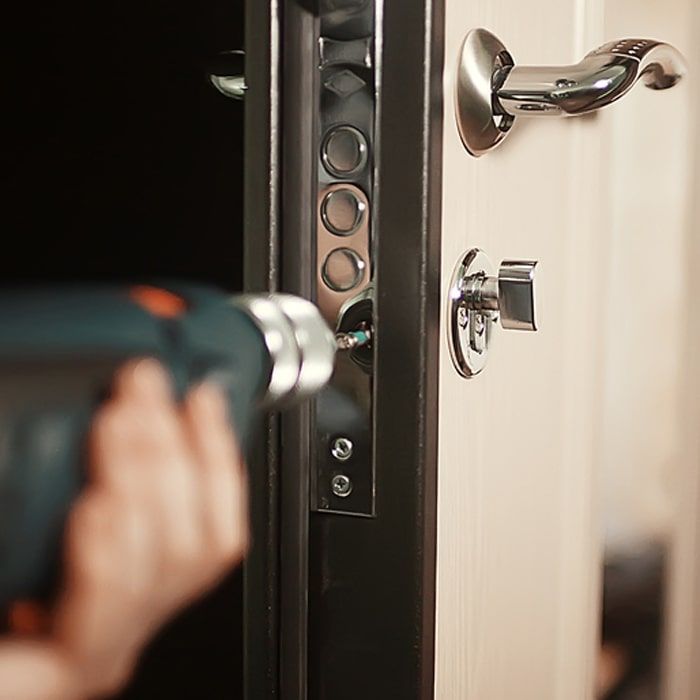
Now, use your drill to create pilot holes if necessary. This step makes screwing in the latch easier and prevents wood from splitting.
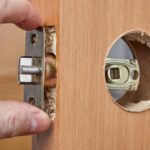
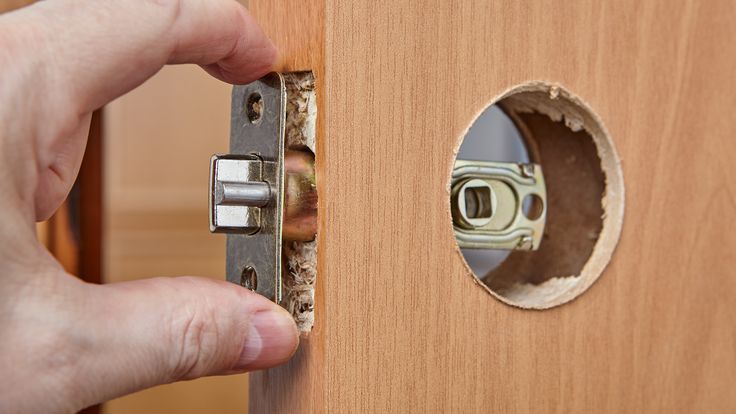
Attach the strike plate first; position it flush against the surface and secure it with screws. Follow up by mounting the latch itself on the opposite side of the door or gate.
Check its alignment carefully before tightening everything down fully. Test that it opens and closes smoothly without resistance—adjust as needed until perfect!
Common Mistakes to Avoid
When installing a latch, there are several common mistakes that can lead to frustration or even improper functionality. One frequent error is misaligning the latch and strike plate. If these two components aren’t lined up correctly, your door will not close properly.
Another mistake is using the wrong type of drill bit for pilot holes. This can cause damage to both the latch and your door material. Always choose a drill bit that matches your screws’ size to ensure smooth installation.
It’s also easy to overlook pre-drilling holes in softer wood materials. Skipping this step may result in splitting, which compromises the integrity of your project.
Failing to test the latch after installation can create unexpected problems later on. Make sure everything works smoothly before considering the job complete.
By being aware of these pitfalls, you’ll set yourself up for success with your latch installation project.


Leave a comment